


If you are someone who works with data or program software then you have heard about Anaconda. It is a software package that has all the important tools that you need while working with machine learning and data science. In simpler terms, it makes working with data a piece of cake. In this article, we will learn more about it and How to Install Anaconda on Different Operating Systems.
Anaconda and Its Purpose
It is an open-source language that comes along with Python and R. You can use it to crunch numbers, scientific computing, and machine learning. People from different fields use it in their development and research purposes.
Besides that, it comes with a package manager that common folks call its “conda”. This makes installing, updating, and managing libraries much easier. You can also use it to make separate workspaces with its own set of packages and dependencies. It makes working on projects efficient and easier which have different requirements.

If you do not like numbers all that much then you can visualize your data by making exciting charts and plots for presentation and analysis. Additionally, it has many tools and libraries for simulations, numerical computing as well as scientific experiments.
Lastly, it is available for almost all major platforms and operating systems such as Windows, Linux, and macOS. This cross-platform compatibility makes it one of the best package managers for developers around the world.
How to Install Anaconda on Windows, Linux and macOS
You now get why people are so gung-ho with its feature set. If you want to experience it yourself by installing it on your system then simply follow the steps given below. The process is not very difficult to follow through and it does not take a lot of time to complete.
For Windows
- Visit official Anaconda web-page through your main web browser.
- Now, that you will have to look for download button.
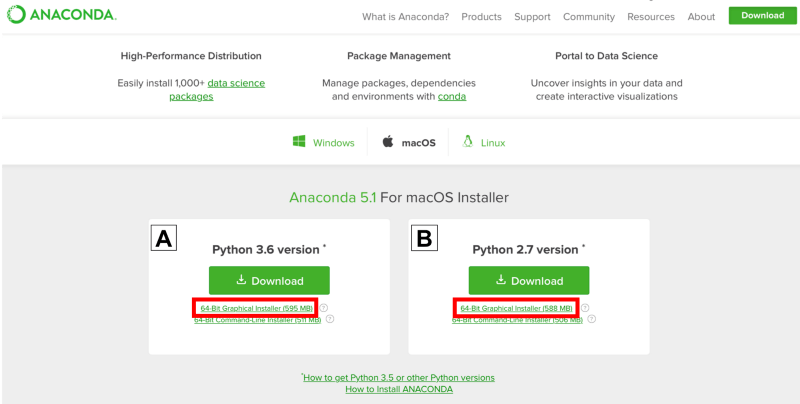
- There are couple of things you will need to choose. First is between Anaconda and Miniconda. And the second is between 64-bit and 32-bit versions.
- We recommend you to select 64-bit version as it is more stable with recent Windows version.

- Save the installer on your local disk drive.
- After downloading, open it by clicking two times on it.
- In the installation wizard, you will have to click “Next” button.

- Also, read and accept the terms of condition.
- Select if you want it for yourself only or for everyone using the device.
- Choose the location where you want it to install.
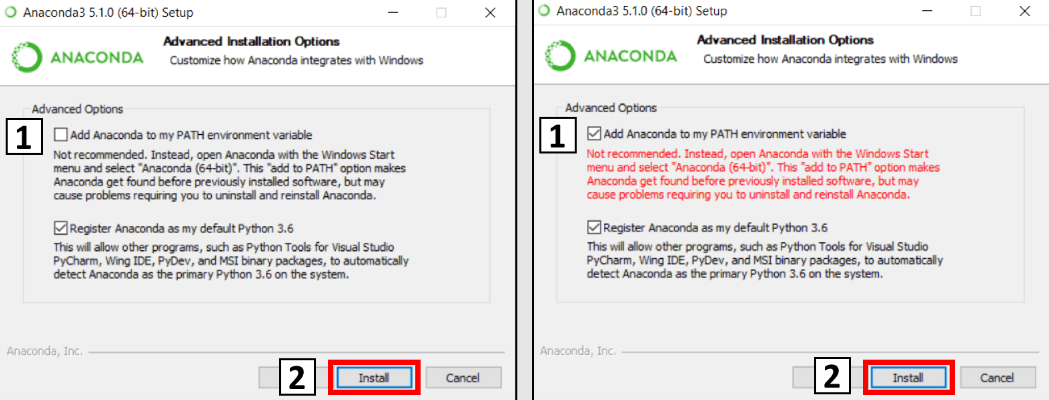
- Also, check the box beside “PATH”.
- Lastly, click on “Finish” button to exit the installer.
For macOS
- In Safari, go to Anaconda’s official download website.
- https://www.anaconda.com/products/distribution.
- Now, you need to choose between “Anaconda” or “Miniconda” version.
- Save the file at a place you will remember.
- Open the download location and double-click on “.pkg” file to launch installer.
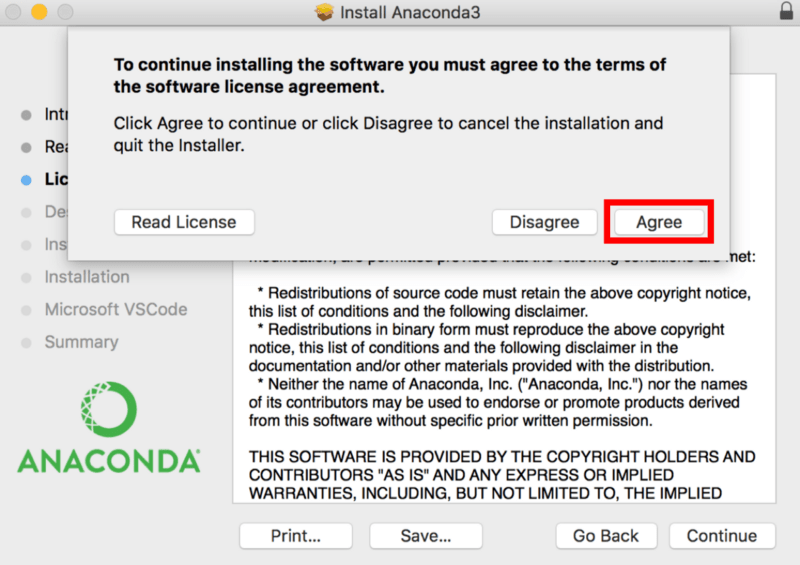
- Also, follow all the steps given and read terms of conditions.
- Choose the location where you want it to install and then enter your password to continue.
- Now, wait for the installation to finish.
- Once it is done, click on “Close” button to exit the installer.
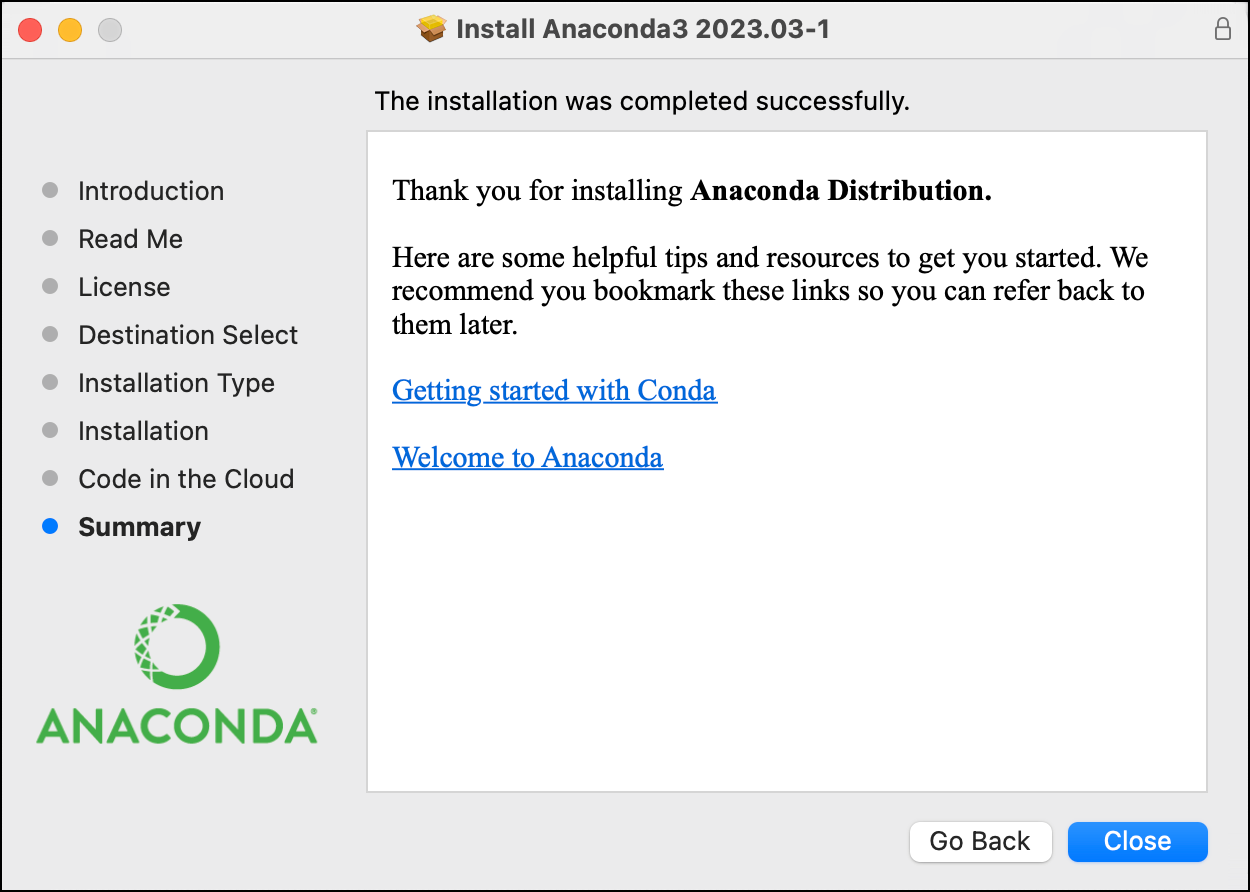
- That’s all. You can now use Anaconda on your macOS device.
For Linux
- Follow the same process of downloading the installation package from the official Anaconda webpage.
- You also have the option to choose between the two available versions with Linux installer.

- Save the file to a location where you can easily access it.
- Now, open a “terminal” from desktop.
- Also, you will need to make installer script executable.
- “replace “Anaconda3-xxx” with the actual filename”
- It will look something like this “chmod +x Anaconda3-xxx-Linux-x86_64.sh”
- After that, run the script using this code.
- “./Anaconda3-xxx-Linux-x86_64.sh”
- Read and accept the terms of condition by typing “YES”.
- Select the place you want to install.
- Type “yes” to initialize Anaconda in your shell.
- Also, you can choose “no” if you want to manually activate its environments.
- Lastly, wait for the code to complete.
- Now, you are ready to it on your system.
Steps to Update or Downgrade Anaconda
If you want to update it to the latest version or downgrade due to lower version then these are instructions on how you can do so.
Updating Anaconda
- Firstly, open command prompt or terminal on your device. (Any operating system)
- Type this line of code to update the “conda” package.
- “conda update conda”
- This will update the package manager to its latest version.
- Type the following to update it all.
- “conda update –all”

Downgrading Anaconda
- Similarly, open command prompt or terminal.
- When upgrading the conda package, specify the version you wish to downgrade to.
- “conda install conda=4.6.14”
- Change “4.6.14” to any version you want to.
- If you need to only downgrade one package the use the specific version number.
- “conda install package-name=version-number”
Conclusion
Almost everyone that works with numbers and data is familiar with Anaconda. This is because it has a lot of functionality with its toolset which makes computing data easier and efficient. It works on almost all computers and operating systems which is why it is popular as well. In this article, we have discuss about it, how it works as well as how to install Anaconda on different operating systems.
Must Read: Install Jupyter Notebook on Windows 10/11 (Top 3 Methods)


